April 21, 2012

Breakfast for Warriors

As you are reading this, Staci and I will be participating in the...


Even though it is almost May and has been 80 degrees in Texas for a good long while, Mother Nature decided it wanted to throw a curve ball and have it be COLD!! Projected Forecast:
Just the normal 53 - 57 degrees outside (not cool...haha). But really, it seems like every time I place to compete in a race in this state, it decides to be cold the day of the event.

Nonetheless, I am super excited about tomorrow!! But thinking of the cold, really just makes me want to curl up in my pajamas on the couch, eating a hot, toasty bowl of healthy oats

But normal oats are boring... I'm talking some tasty oats that feels more like dessert than breakfast

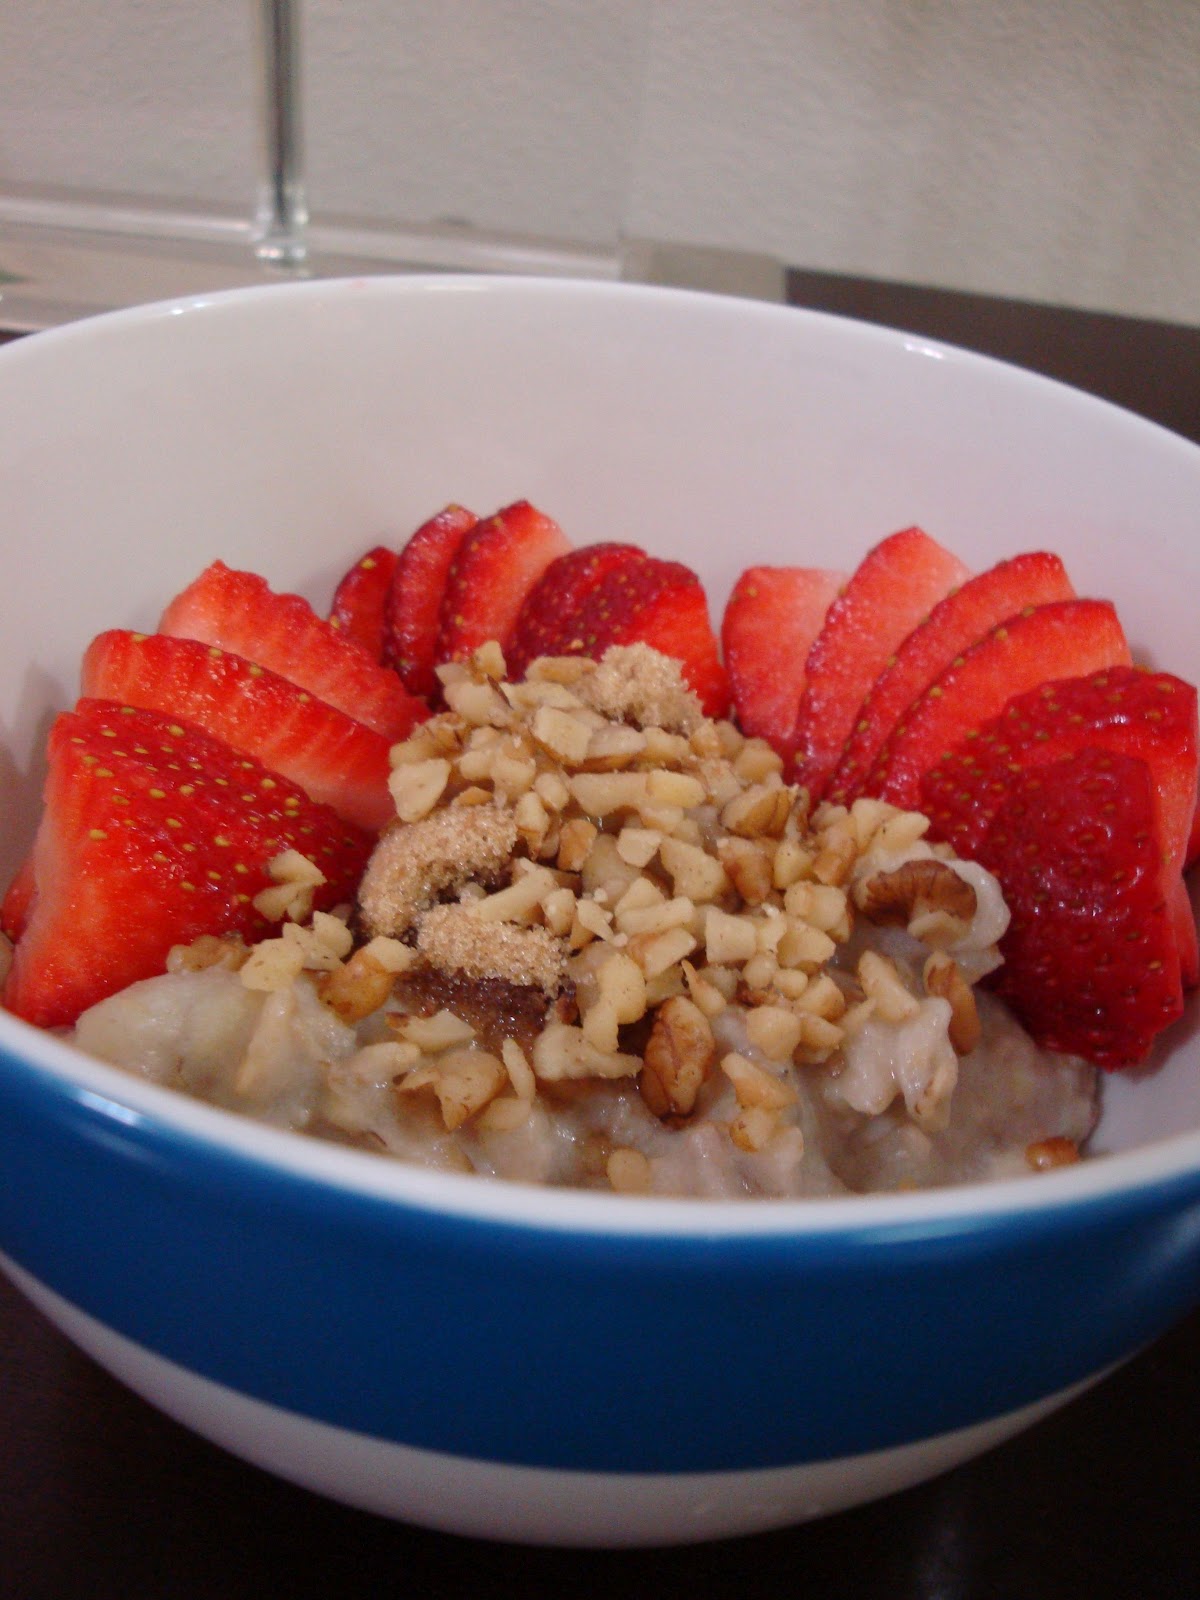
Enter: Strawberry Banana Oatmeal

Trust me, it is even more delicious than it looks. At it has the added bonus of sneaking in some protein to give it an extra healthy kick that will help you to feel fuller for longer.

Recipe for success? Start with 1/4 cup of unsweetened almond milk and 1/4 cup water into a small saucepan over medium heat.
don't forget the water too!
And drop a banana in the pot...

Now chop up your banana into a million little pieces with your wooden spoon. It doesn't have to be perfect, it just has to be in many small pieces.

Now, let that mixture come up to a simmer. It will look like this:

Nice and bubbly... and the banana magically disappeared!! It's still there... no worries.

Now, back the heat down to medium low and add in your 1/4 cup rolled oats.

 Now cook your oats on medium low for about 10 minutes or until they are nice and tender. Next comes the protein part... Egg Whites!!
The packaged kind really do work better in this situation than egg whites from a "real" egg.

To add these 1/4 cup egg whites to your hot oat mixture, you will need to take your little pot off of the hot part of the stove. Stir the oats around to get some steam (and heat) out.

VERY SLOWLY, pour your egg whites into the oatmeal mixture, and stir the oats vigorously as you go. A little coordination is required for this maneuver.

If you thought your oats were a little too wet for you, they definitely will NOT be runny after the egg white addition. The egg whites bulk up the oats a bit and add to a nice fluffy texture.

Once all the egg whites have been combined, you are ready to serve your oats for one! Garnish with strawberries, brown sugar, chopped nuts, or whatever else you might like!

Chocolate would also be a good addition... :) 


April 20, 2012

Cooking with quinoa!

Hello!  My name is Staci, and I am lucky enough to write a guest post on Kimberly's amazing blog.  Kimberly and I are currently in graduate school for clinical nutrition together.  Kimberly and I are a lot a like..we love bootcamp, running, of course food, and we have an obsession with anything pinterest related!  Like any normal friendship, I texted her a picture of the dinner I just made (definitely normal) and the next thing I know, she asks me to do a blog post.

I feel like I won an oscar, since I love this blog so much!  As I said earlier,  I love pinterest and have an obsession with pinning anything food related.  I need therapy! Everywhere you look on pinterest, there is a recipe for quinoa.  I love cooking with quinoa. I guess it is new and trendy even though it has been around forever.  Little do people know, quinoa is a good source of protein.  I am definitely a huge fan! I am always looking for ways to make recipes healthier, since I am a future dietitian and all.  I saw a great recipe for quinoa mac and cheese. I knew I had to make this comfort food healthier, and it was beyond amazing. I apologize for my picture not being so great (first time blogger).


Ingredients:
  • 1 1/2 cups of quinoa
  • Veggies (I used spinach)
  • Salt
  • 2 Cloves Garlic
  • 2 Eggs
  • 1 cup Nonfat Milk
  • 1 1/2 cups cheddar cheese
  • Parmesan
  • Whole Wheat Bread Crumbs
Preheat your oven to 350 degrees. The first step is to make the quinoa according to the package directions. It usually takes around 15 minutes.  I used rainbow quinoa from whole foods which takes around 20 minutes.  As the quinoa is cooking, you will need to cook the veggies you plan to use in your dish.  I used spinach but next time, I will probably add onions and broccoli.  You can add anything you want or have in your house!


Whisk the eggs and milk together in a bowl.  After the quinoa is cooked, you will fold in the eggs and milk along with the cheese and veggies.  Once everything is folded in together, it can be transferred to a baking dish.  I added whole bread crumbs and more Parmesan to the top of the dish. Bake around 30-35 minutes until the top is browned.  Enjoy!!

April 19, 2012

Turkey Time!

I know I showed you last time how to cook your turkey burger with vegetables, but this time I am going to show you how to make the burgers!

Using turkey is a great alternative to using beef in your burger grilling extravaganza. You are able to get a nice lean portion of meat that is a lot lower in saturated fat than beef (Remember: saturated fat is the stuff that can clog your arteries!).

I know, I know you can buy very lean portions of ground beef now as well, however it can end up a little dry. The best thing about lean turkey? You can impart lots of flavor in the burgers using a few trick (I'll show you!) and lean turkey is typically cheaper than super-lean ground beef!

I'd call that winning...

Now on to the good stuff:

Print this recipe!

Spicy Turkey Burgers

Ingredients
  • 0.75 pounds lean ground turkey
  • 1 teaspoon olive oil
  • 1/4 of a small onion, diced
  • 1/4 of a small red bell pepper, diced
  • 1 egg white
  • 2 heaping tablespoons bread crumbs
  • 1/2 teaspoon red pepper flakes
  • 1/2 teaspoon italian seasoning
  • 1/4 teaspoon pepper
  • 1 dash of salt
Directions

Place the olive oil in a small skillet over medium heat. Once the oil is hot, sauté the onion in the pan until is becomes semi-translucent and just a tad brown around the edges. At this point, put in your red bell pepper and sauté until everything is soft and golden brown in color. This should take about 5 minutes. Set aside to cool.


When it looks like this, add the bell peppers!

In a medium bowl, combine all of the remaining ingredients. When the onions and peppers and cool enough to touch, dump those in the bowl as well.

Throughly combine all of the ingredients together with your hands. If the mixture is too wet, add a little more breadcrumbs so that everything will come together.

Shape burgers into 3.5 - 4 ounces a piece (or divide mixture into four equal portions).
Sorry, it was dark!
Grill until completely done!


April 16, 2012

Grill Master

I love Summer Time.

It is warm outside, it doesn't get dark at 5:30 pm, and tans are a must! And of course, the warm nights make it so easy to grill out!
Grilled Food... Yum!
Grilling is a great way of cooking too! The fire imparts flavor to your food, without any added oils. Grilling may be intimidating to some, but it's really not scary at all! To just need to know your fire!

Example: lets grill some vegetables and turkey burgers!

First step, you need to slice your vegetables. Today, I'm grilling zucchini, squash, onion, red bell pepper, and corn.

Slice the zucchini and squash lengthwise, so they are about 1/4 inch thick. But don't cut them into small rounds, otherwise they will more easily fall through the grates!!

Slice the onion into large rounds and peel down the husk of your corn to get all the little strings out. Just don't take the husk all the way off!

For the bell pepper, cut into thick strips, about 1/2 - 3/4 of an inch in width.

Onto the grill! Placement of the vegetables is key! The grill I was using wasn't very powerful, so I had the fire on high heat the whole time. But if you have a nicer grill, you will need to adjust the heat accordingly.

If you are making burgers/ turkey burger, put those on over the portion of the grill with the highest heat. Same with the corn. I like to typically put the corn in the back, because it will need to cook for a little while.

Place the zucchini and onion over medium-high heat. You want them to get some nice grill marks, but you don't want them to be charred (aka: over some flames, but not the hottest part of the grill).

The bell peppers won't take that long to cook, so place those on the top little rack.

Timing:

The burgers and corn will take the longest to cook, that is why they need to be more directly over the flame for the entire grill-session. Those items should also be the first to go on the grill.

Zucchini, squash, and onion will need less time and be the next items to throw on the grill. But by putting them over lower heat, you can essentially put them on and take them off around the same time as the burgers/ corn.

Red bell pepper: This one is a little tricky. By placing it on the little shelf above the grill, it can stay on for a longer time without getting soft and mushy. They will get tender sitting there for the duration of your grill session. But to get a little char on the outside, I like to move the bell peppers to the grill about 5 minutes before everything is done.

My total time spent: about 30 minutes on the grill. It may take a little time to get to know the hot spots of your grill, but if you just keep an eye on the food and don't leave it unattended, you will get experienced at perfectly grilling your food all the time!

Enjoy!