April 28, 2012

Gone Coconuts!

So what does one do on the Friday night before exams??

Eat dessert ... duh!

Like any good student, I stayed in on this Friday night fully expecting to chill, but get some studying done.

50% was accomplished.... I did NOT study!!! It's just so hard to study when sitting on the couch under your favorite heated blanket just sounds SO MUCH BETTER!!

The "chill" part, however, I completed with flying colors! And I did just that with a cold and creamy bowl of delicious-ness!

Enter: Coconut Milk Chocolate Chip Cookie Dough Ice Cream
I have been wanting to try coconut milk ice cream for AGES!! But, I had never purchased it because it was so expensive ($6 for a pint = pricy!)

BUT, I decided I deserved a little something sweet for doing all the studying that I plan on doing. So, I scooped it up and never looked back. And boy, I am so glad I did!!

This ice creamy is incredibly creamy and has a wonderful flavor. The ice cream does have a coconut flavor, but it is very mild and in no way overbearing. I like the flavor of coconut, but I'm not a fan of the shredded stuff, so this ice cream combines the best of both worlds!!

Cookie dough flavor... great choice! But I actually liked the flavor of the ice cream so much better that I'm considering just trying the "vanilla" or whatever the non-flavored kind is next time!

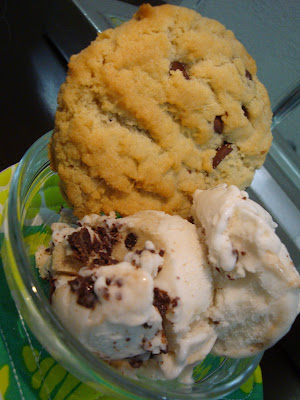
look at that marbling! 
As you can see from the above picture, the ice cream not only had cookie dough, but it also had a chocolate swirl. Score! And because it is made with coconut milk, the resulting ice cream is a lot denser than the normal stuff, so a little goes a long way.

Seriously, I might have to open up a coconut milk ice cream shop, because this ice cream blew my taste buds out of the water!!


This was my dessert last night: a little scoop of ice cream with a warmed cookie on the side... delicious! 

But really, go try some coconut ice cream ASAP!! You will love it!!


seriously... go now!!


April 26, 2012

Countrytime

Let's begin today with a riddle:

What is the one best doughy morning treat that is perfect either savory or sweet?
(and I didn't even mean for that to rhyme!)

Give up??
Biscuits!

Like any normal person, this concoction came out of a late night craving for these delicious fluffy clouds. 
It also happened to be around Easter time, which increased my desire for a carb laden snack.

Backstory: Every Easter and Thanksgiving I will go down to my aunt and grandmother's house in Tennessee. And every morning, my aunt will make homemade biscuits for breakfast and I will always eat probably between 2 - 3 of them because they are just so darn tasty.

Now, you would think if my family are good biscuit makers, I would be able to whip up a batch super quickly.... WRONG! Somehow, I did not inherit the biscuit making gene.

My aunt and grandmother's biscuits had two ingredients: buttermilk and self rising flour. But no matter how many times I've tried, I cannot master that type of biscuit to save my life. So I went in a different direction:

Whole Wheat "Buttermilk" Biscuits

And to my pleasant surprise, they were not hard biscuit rocks! They were nice and fluffy and ready for dousing in butter and honey. Enjoy!


Ingredients
  • 1/4 cup soy milk
  • 1 teaspoon white vinegar
  • 1/4 cup whole wheat pastry flour, sifted
  • 1/4 cup all purpose flour, sifted
  • 1 teaspoon baking powder
  • dash of salt
  • 1 tablespoon butter/ vegan butter
  • 1 tablespoon canola oil
Directions

Preheat oven to 425 degrees F.

In a bowl or cup, combine the milk with vinegar and set aside. The vinegar with help to sour the milk and make it taste more like buttermilk (You could always just use buttermilk and omit this step).

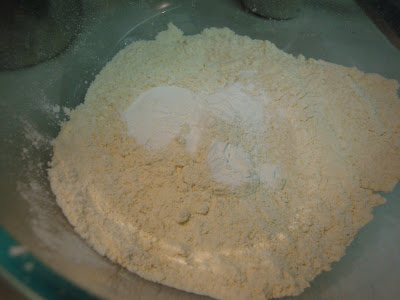
In a bowl, combine both flours, baking powder, and salt. Mix to combine.

Next, take the butter and "cut" it into the flour. Basically, take your fingers and crumble the butter up with the flour mixture, until it looks more coarse, and a bit like sand.


Pour the "buttermilk" into the flour and briefly mix until all everything is moistened.

Flour a surface of your counter top, and then dump the biscuit dough onto counter. Dust top of dough with a little more flour. Knead dough 3 - 4 times. It will look like a very soft dough and be semi-sticky.


Cut dough into rounds with a biscuit cutter and place biscuits in the center of a cake pan, having the biscuits touching. Drizzle oil on top of the biscuits, and bake for 9 - 11 minutes or until golden brown.

Bake and Serve Immediately! 

April 24, 2012

Strange Food Week

I hope everyone is having a great start to the week! This week is my finals week, so I apologize for the random food posts that will be surfacing in the next few days.

You can be sure there will be lots of creative "dishes" coming your way in my attempt to eat all of the food in my refrigerator/ pantry before I leave to go home next week.

So, to start this week off right, I present you with some Black Beans
And yes, I mean black beans from a can. We're not even talking "fancy" black beans that you have to soak the night before and then let cook for an hour before you can do anything remotely delicious with them. Just old fashioned, straight from a can black beans.... low sodium please!

One Pot Black Beans


Like most savory recipes I come up with, this one also calls for sautéing diced onions in 1 teaspoon of olive oil over medium heat in a medium sized pot. Cook until translucent and slightly browned.

Before
After
When the onion look the above picture, dump in your can of black beans. You don't rinse the beans, you just dump everything in the pot, liquid and all.


Next, add 1/2 teaspoon of red pepper flakes, 1/2 teaspoon pepper, and a pinch of salt. And add some fresh squeezed lime for good measure.

Allow the bean mixture to cook down for about 15 minutes, or until the liquid is slightly thickened. 


And that's it! A one pot wonder! These beans are perfect as a side dish, or just eating on their own!

PS: Don't you love my Lilly Pulitzer coasters?!